Photography Tutorial 101: Outdoor Light
A lot of people think that natural lighting is all you need in order to take good pictures. They assume that heading outside and shooting to their hearts content will produce the images they are longing to achieve.
And sometimes, they are right.
Natural lighting is certainly a great way to improve your photography. But there is more to great outdoor images than just catching the sunlight. So as part of our Photography Tutorial 101 series, I thought it would be nice to review some of the best tips I know of for taking great outdoor shots.
Timing is Everything
You see, natural lighting can be great – assuming you are out at the right time of day. If you try to shoot images of people, for instance, in the middle of the day when the sun is high in the sky, you will find yourself combating ugly shadows and squinting models.
That’s why a lot of photographers strive for that magic hour – usually the first hour after sunrise and the last hour before sunset. The sun is neither overpowering or distracting during those times, and with it a little lower in the sky, it can actually soften your subjects and help them to appear more youthful and well-rested.

When Timing Isn’t An Option
It’s great when you can plan a shoot to fall right in that magic hour, but sometimes, you just don’t have much of a say in when you will be shooting. Maybe you want to catch some shots at your child’s soccer game or perhaps getting the entire family together for a group shoot means meeting in the middle of the day. What do you do if that sun is right overhead?
You actually have a few options when that natural light of yours is a bit too much. You can wait for some cloud cover, find some shade or – you can diffuse the light. To accomplish the latter, you just need a diffuser to hold between your model and the sun. Diffusers can be purchased at any photography supply shop or you can get creative with objects that will deflect the sun, such as a piece of translucent white cloth.
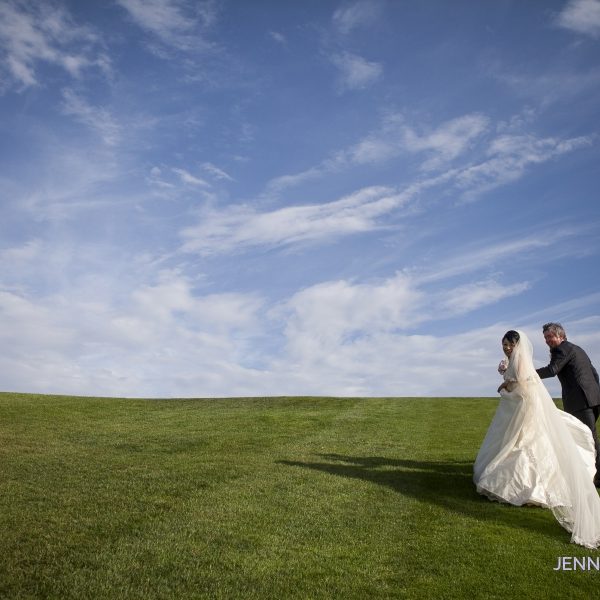
Put the Sun to Your Back
Shooting with the sun behind your subject will usually wash them out if you don’t know what you are doing, but shooting so that they are looking into the sun can result in squinty eyes and wrinkles. So what’s the solution?
Situate yourself with the sun to your back, but direct your subject to look somewhere away from the light. In some cases, this may mean you don’t have your model looking directly at your camera, but that can actually produce some incredible shots if you remain aware of what they are looking at. And for those straight grin into the camera shots, angle yourself so that your models can look at you comfortably, without facing off too directly with the sun’s rays.

 Pay Attention to Your Background
There are some scenes that can seem just as important to capture as your subjects when taking outdoor photos. In those cases, frame the image so that your subject is still a focal point using the rule of thirds, but allow some of that background to be drawn into the shot as well.
Of course, as with any photography, you will want to remain aware of your surroundings. Taking pictures at the beach, for instance, can result in unintentionally capturing topless sunbathers – typically a faux pas when taking some nice family photos. So even when the scenery seems picture-perfect, keep an eye out for any unwanted photo bombs that may ruin an image. And don’t be afraid to zoom in on your subject and cut the rest out when necessary.
Find Open Sade
If all else fails, move your subject to the north side of a building into some pretty open shade. Sure its a cheat to using the sun, but it sure is flattering!


